WEEKS 14–15
Anaconda vomit all over the floor
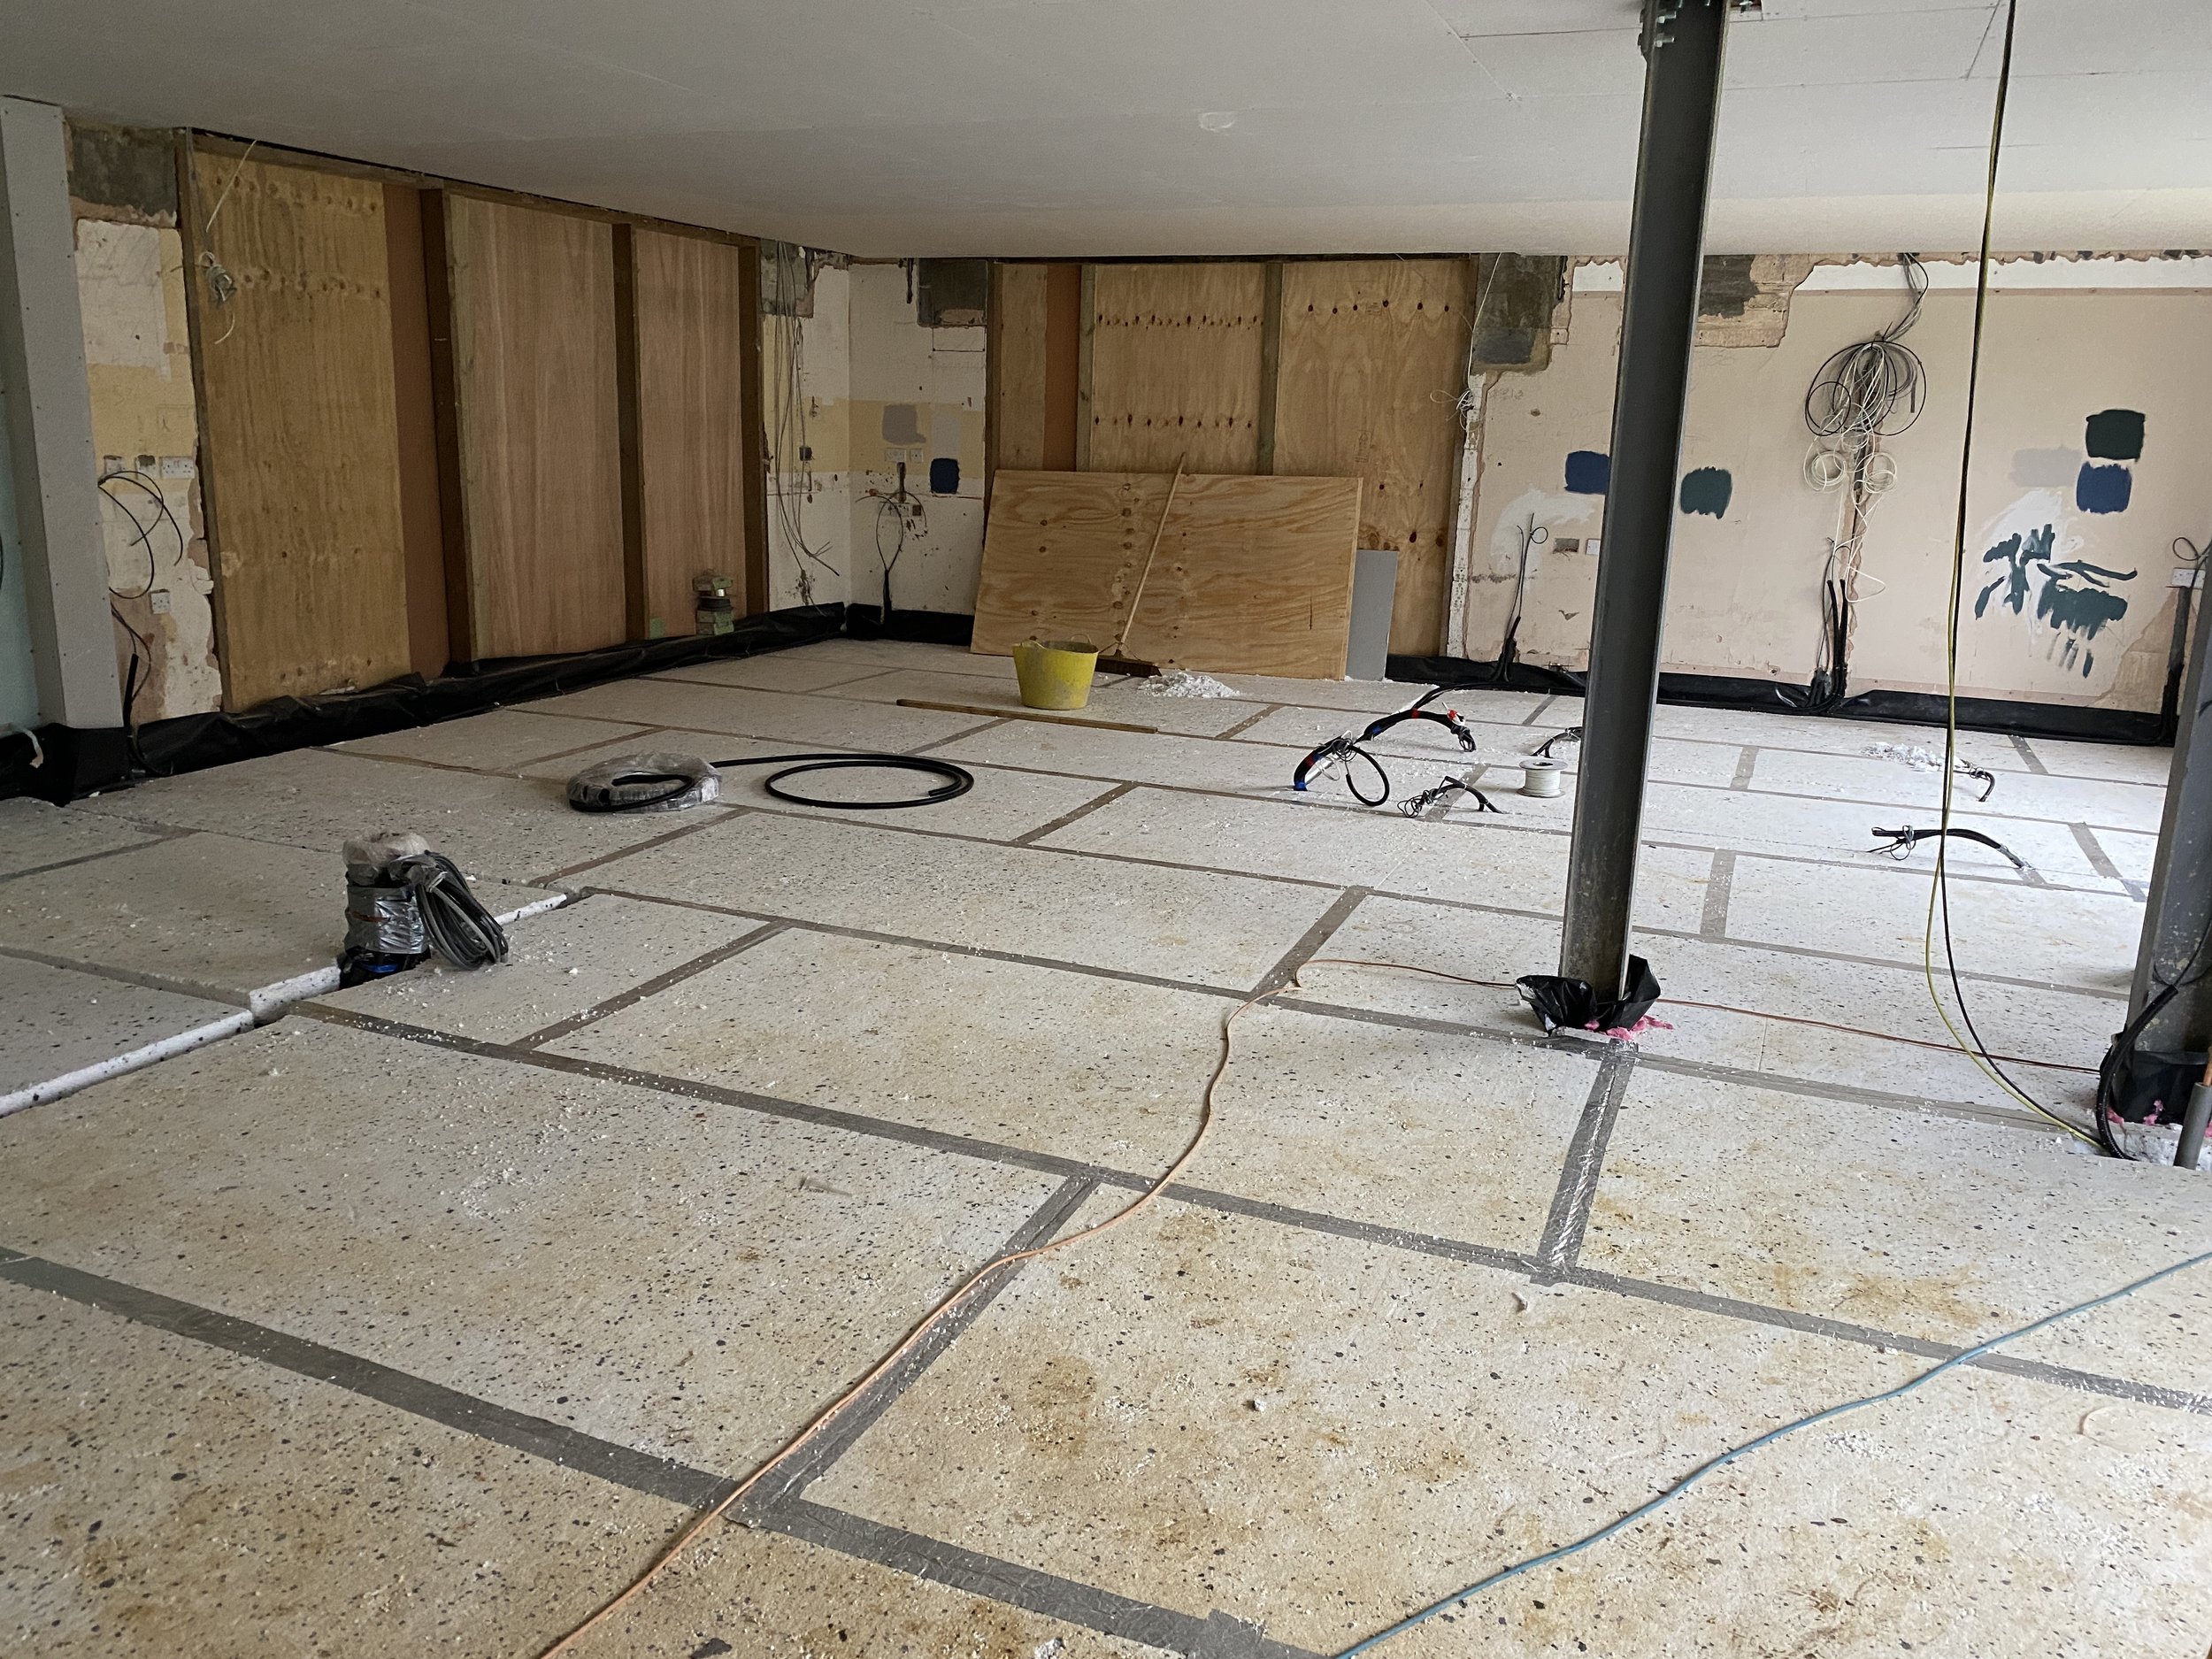
To lay wet underfloor heating first the floor is insulated with polystyrene sheets. The wires sticking out are for a 5 amp circuit for lamps and speaker cable for floor standing speakers. You can also see the down-pipe for the hob extractor
We have really made great leaps forward this week. Firstly my lovely plumber laid the pipes for the underfloor heating. He was careful to mark out cabinet spaces so we aren’t wasting energy heating under cupboards. Or worse the fridge. The white plastic pipes in the photos will carry the water that warms the floor. The area to cover is over 120 square meters. It took 450m of pipes. You don’t ever want to joint the pipe either as a leak once the tiles are down will be a disaster!

The plastic pipe that will carry the warm water for the underfloor heating system is looped and tacked onto the polystyrene insulation boards

The mixer for the screed next to a mound of sand. The sand gets shovelled into the scoop. Then its mixed and forced into the house through the thick black tube

The underfloor heating is finished in the back half of the kitchen diner. The high sand content of the screed means you can get a perfectly flat surface for tiling

The plumber is marking out the kitchen island so he can avoid laying the heating pipes underneath it

The screed is finished and the floor is flat. The wires for speakers, lamps and extractor pipe are all still in place. Now we just have to wait for the screed to dry hard
Once the pipes are down the screed van arrives. Screed is basically sandy cement which is compacted around the water pipes. It conducts heat well and gives a nice flat surface.
Sand, cement and water get mixed in the cement mixer outside. Then it gets pushed into the house through a massive thick black hose. It was like having an anaconda vomit all over the floor. It was a bit weird to watch, but after just 1 day the job is done. Now we have to let the screed harden. Being careful not to walk on it. Then we can slowly turn the heat on to finish the drying. If you heat it too fast the screed can crack, so baby steps.

The aluminium glass sliders are in. They look amazing! They slide from both sides for maximum flexibility. Suddenly the room feels open and so bright. They are powder coated in Umbra Grey RAL 7022. It’s softer than the standard anthracite grey and blends better with warmer interiors. I just love them!

We went through a lot of paint samples before deciding on the scheme! It’s Farrow and Ball French Grey for the windows. Farrow and Ball Drop Cloth for the internal wooden furniture and pointing for the walls. Inchyra Blue for a pop of colour on the Island

The new wooden casement windows are in. They flank the back door in the boot room and where the kitchen sink will be. I’ve gone for Farrow and Ball French Grey which I think will look stunning with a grey/white render on the top half of the house
The other major break through this week is that the windows arrived. Wooden casement windows for the new toilet, above the kitchen sink, and the boot room. Massive aluminium glass sliders for the kitchen-diner.
The casement windows are spray painted before they arrive. This means I’ve had to start thinking about colours for the outside of the house. I don’t think the outside and the inside need to be the same colours but I do want them to blend. I looked at Zoffany and Farrow and Ball colour charts as I love their ranges. I’ve gone for Farrow and Ball French Grey for the windows and Shaded White for the render. Although I reserve the right to change my mind when I see it actually on the render as I can’t get that high up with my sample pot!
Inside I’ve gone for Farrow and Ball Drop Cloth which is a lovely taupe colour and blends with the French Grey. I’m using Pointing as my white. For a pop of colour on the Kitchen Island I’m thinking Inchyra Blue to blend with the Teal and Peacock colours of the curtains. It took a while to choose the colours as you can see from the patchwork of sample squares on the wall!
The aluminium sliding doors are powder coated in Umber. Its a RAL colour as you can’t choose designer paint for the aluminium coating but I’ve used it before and I think it goes with everything. I like it more than the usual anthracite grey as it’s just a bit softer.

I don’t like seeing curtain tracks so I’ve dropped the ceiling across the kitchen-diner but left it full height just in front of the aluminium sliders so the curtain track can sit here hidden from view
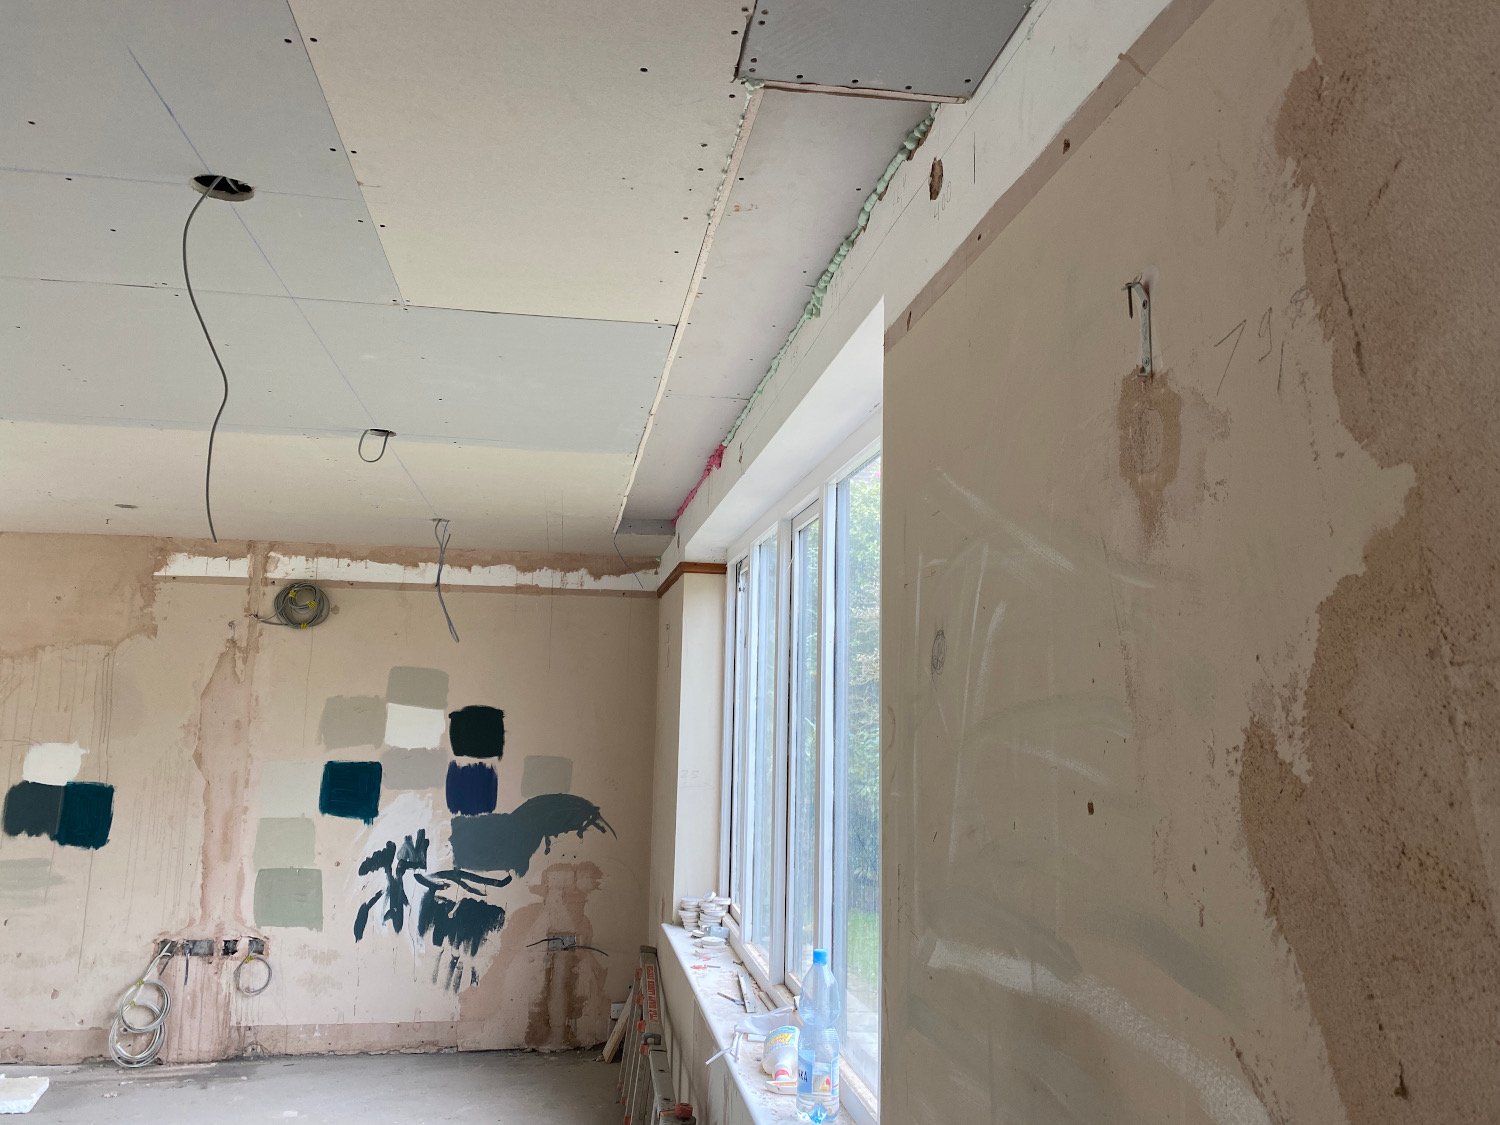
I’ve left a recess in front of the large front window to hide the curtain track here too. I will also run LED strips inside the recess to wash light down the curtain fabric
The glass sliders feel huge now they’re in. I wanted sliders instead of bifold as I like the bigger panes of glass. These ones don’t have a fixed pane either so you can open them from either end.
The room is now so light I’m thrilled with the look. I am glad that I decided to go for curtains on this project though, with glass this big I think I’d feel a little exposed at night even with garden lighting on.
I knew I wanted curtains here from the start. But I don’t like seeing curtain poles or tracks. To hide it I’ve dropped the ceiling a little across the entire room but left the original ceiling height in front of the windows. This has created a recess for the curtain track to sit in. The recess isn’t as deep as I’d like because there is a joist directly above it. The joist holds the ceiling up so it can’t be moved. Even so, with the new track systems available now I think the recess will be enough to hide the curtain track and the top of the curtains so it should look very slick

I’ve chosen Warwick Velvet in Peacock as the kitchen-diner curtain fabric. I think teals, greens and rich blues are so gorgeous and so on trend right now. The soft velvet hangs so beautifully and should look fab lit from above by my LED strips

Warwick Mystic velvet in Forest will hang as full length curtains in the master bedroom

I’ve chosen Warwick Mystic fabric in Ink for the guest suite again as floor to ceiling curtains. The darker colour is a bit more dramatic

The childrens’ bedroom is having Warwick Mystic Royal as roman blinds. I can’t do floor to ceiling curtains here as one of the boys beds sits near the window. Instead I’m getting black out lining built into the blinds
The recess also lets me put LED strips along the top of the curtains. These will wash light down the fabric. To get the best effect from this I’ve chosen soft velvet curtain fabric. I want the house to feel like one entity rather than a collection of rooms. To help pull it together I’m using a touch of this soft velvet in most rooms. The fabric is from Warwick and they do an enormous range of colours in their velvets. I’m using Peacock in the kitchen diner. Ink in the guest bedroom. Royal in the childrens’ bedrooms. And Forest in the master. The house still feels a long way off hanging curtains but we are getting there!
WEEKS 16–18